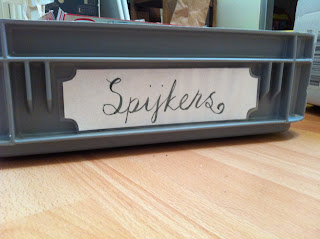
Labels! They are the best to have when you are organizing a space. So today I will show you how you can create a snazzy label and laminate it. The laminating will protect it from any wear and tear that may arise from future use.
- a pencil
- eraser
- scissors
- card stock or printer paper
- a paintbrush
- watercolors
- a ruler
- a laminating machine
 For the first step, you will need to cut your paper to the desired size. Since I am using my labels for a particular box, I measured the width and height of the part of the box where I am putting the labels. I then subtracted half a cm from the top and bottom. The laminating pouch will stick out a bit on all sides, which means I have to accommodate for that. Then cut to size.
 Fold the paper in half and trace the corners with a small bottle cap. Then cut and you are left with some neat looking paper. Measure the height and trace a line two thirds from the top of the paper. This will be where you will write whatever label text you want. I practiced as you can see and managed to get it wrong. Scrws, what is that?!
For the next step, you need a watercolor that you are satisfied with. I mixed my black shade out of blue and brown. For help with choosing a nice font, you can visit websites like http://www.1001freefonts.com/ where you can find fonts for free. You can print out the fonts and then practice on making the same. When you have painted the labels, remember to erase the lines!
For the next step, place your labels into the laminating pocket. I have A3 size pouches, so I had to trim mine down before laminating the piece. Turn your laminating machine on to the desired setting. Mine has both cold and hot laminating, so check your machine documentation before starting.
For bigger laminating pouches, it can be a bit tricky to keep the paper in the same spot as you are lifting the pouch up. I used a piece of cardboard on the underside to help keep everything in the same place. Just remember to not push the cardboard into the machine!
Once the pouch has gone through the machine, you need to cut the plastic off. I used a trimmer for the sides and scissors for the corners.
And there you have it, the final result. Attach the label with double sided tape and you are good to go!
I hope you found this tutorial helpful. If you have any comments or suggestions, press the comment button below.


